
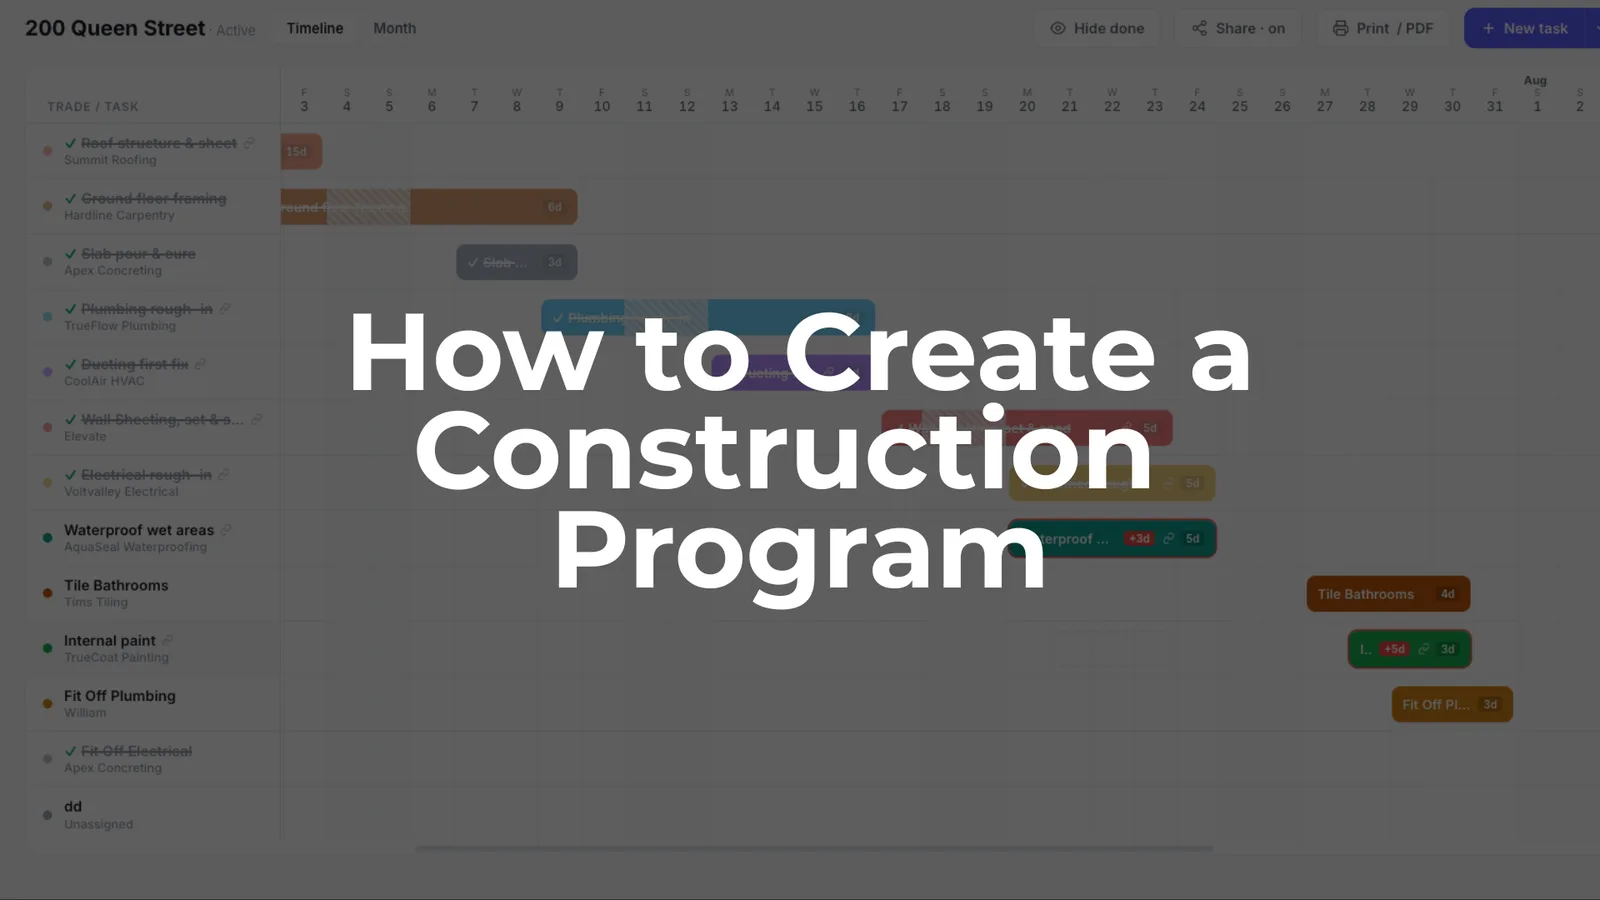
Every construction project in Australia needs a clear plan of attack. A construction program — sometimes called a construction project schedule — is the time-scaled plan that maps out every activity from site establishment through to practical completion. It outlines tasks and their relationships, coordinates trades, materials and inspections, and gives everyone on the job a shared understanding of what happens when.
Under Australian standard contracts like AS 4000, contractors are required to submit a schedule that shows the sequence of activities, project milestones and the critical path. Beyond the contractual obligation, a well-structured program reduces the risk of delays, keeps costs under control, and helps manage timelines and resources. A good program integrates design, procurement, construction, approvals and commissioning into one cohesive document.
This is a practical, step-by-step guide to creating a construction program for Australian residential and commercial projects — with real dates, sequences and examples that reflect typical Australian conditions like public holidays, weather seasons and local authority rules. For the wider context on what a program is and why it matters, start with our complete guide to construction programs.
Step 1: Define the project brief, contract dates and constraints
Scheduling starts with your contractual dates and constraints, before a single task is added. Defining the scope means identifying the deliverables and boundaries — what’s being built, when it must be finished, and what conditions apply.
Gather these first:
- Contract award date and site possession date
- Date for Practical Completion and any interim milestones (lock-up, weathertight)
- Liquidated damages clauses and their trigger points
- Planning and building approvals — DA, CDC or heritage approvals
- Long-lead procurement — windows, joinery, structural steel, lifts
- Site constraints — access hours, council noise restrictions, shared driveways, crane permits, body corporate rules
Concrete example: a Brisbane townhouse project awarded 1 February 2026, with site possession on 15 February and a 32-week construction period targeting practical completion on 20 September 2026. Council conditions restrict work to Monday–Saturday 6:30 am–6:30 pm, with no work on Sundays or public holidays. The builder identifies that custom window frames have a 10-week lead time, so they must be ordered before slab completion.
Account for regulatory compliance and site constraints from the outset, and match the level of detail to the project — a simple renovation needs fewer layers than a multi-storey commercial build. These dates and constraints will later drive your baseline schedule and the project’s critical path.
Step 2: Break the job into stages and major activities
A work breakdown structure splits the project into manageable phases and tasks, giving it a logical structure before you assign durations or resources. For a typical Australian residential project, common stages include:
- Pre-construction (surveys, geotech, permits)
- Site establishment and preparation
- Earthworks
- Slab / foundations
- Framing and roofing
- Lock-up (external cladding, windows, doors)
- Rough-in services (electrical, plumbing, HVAC)
- Internal linings
- Fix-out and finishes
- External works (driveway, landscaping)
- Commissioning and handover
For a two-storey house in Sydney, specific tasks within these stages might include a Sydney Water tap-in, BASIX compliance checks, and a frame inspection by the private certifier. Commercial fit-outs use different deliverables — demolition, base-build works, partitioning, ceiling systems, glazing, joinery, finishes, commissioning and client training.
Keep this level high: carve the job into logical, schedulable chunks rather than listing every minor task. Each activity should be clearly scoped so you can later assign resources, track progress and measure actual against plan.
Step 3: Decide on your scheduling method and tool
The industry uses several scheduling techniques, from whiteboards and spreadsheets to purpose-built software. Choosing the right method and tool early prevents scattered information and version confusion later.
| Method | Best for | Limitation |
|---|---|---|
| Gantt charts | Small–mid residential and commercial | Can get complex on large jobs |
| Critical Path Method (CPM) | Large or complex projects | Steeper learning curve |
| Line of Balance (LOB) | Repetitive projects (e.g. multi-unit housing) | Limited to linear workflows |
| Q scheduling | Combining resource management with task sequencing | Specialist knowledge needed |
Gantt charts visually represent the timeline and tasks, and are ideal for most small to mid-sized Australian projects. Line of Balance suits repetitive work like rows of townhouses.
Excel is cheap and accessible, but formulas break, updating dependencies is manual, and there’s no live link to actual progress. A tool like SiteCal offers a calendar-first interface that builds a Gantt-style timeline while staying simple enough for busy builders and site managers — tasks link automatically, so move one and the dependent tasks shift with it. Pick one primary tool and use it consistently across all jobs.
Step 4: Build a timeline with realistic durations
Durations are what turn a task list into a usable schedule. Estimate them from historical production rates and resource availability — not guesswork — and validate the assumptions with the trades doing the work.
Worked example — 250 m² single dwelling in Melbourne:
| Activity | Expected duration |
|---|---|
| Site establishment & earthworks | 2 weeks |
| Slab (formwork, pour, cure) | 3 weeks |
| Framing & roofing | 4–5 weeks |
| External cladding & windows | 2 weeks |
| Rough-in (electrical, plumbing, HVAC) | 4 weeks |
| Internal linings | 2 weeks |
| Waterproofing & tiling | 2 weeks |
| Painting & finish work | 2 weeks |
| External works | 1 week |
| Commissioning & clean-up | 1 week |
That puts construction around 18–20 weeks in favourable conditions. Australian-specific factors that affect durations include wet seasons in Queensland and the Northern Territory, shorter winter daylight hours in Victoria and New South Wales, and mandated RDOs under the Building and Construction General On-site Award.
Assume ideal conditions first, then pad only where there’s known risk — long-lead items, council approvals, seasonal weather. Avoid arbitrarily inflating every task. Place these durations on a bar chart or calendar view to create the first draft of the schedule.
Step 5: Set task dependencies and build the critical path
Dependencies determine the order of activities. You can’t frame before the slab is poured, or line walls before the frame is inspected. The main relationship types, in plain language:
- Finish-to-Start (FS): the slab must finish before the frame can start (the most common).
- Start-to-Start (SS): overlapping trades — the electrician and plumber begin rough-in on the same day.
- Finish-to-Finish (FF): coordinated completion — tasks like painting and final clean finish together.
- Lags / leads: a 7-day concrete cure lag between pour and strip.
The critical path is the longest chain of dependent tasks that determines the shortest possible project duration — and therefore the completion date. Any delay on it moves handover. Non-critical tasks have float (slack) and can absorb minor delays without affecting the end date; critical-path tasks have none.
Example critical path for a townhouse: site establishment → earthworks → slab → frame → roof → external windows → linings → waterproofing → tiling → PC items → practical completion.
Knowing the critical path tells you where to prioritise — where to add labour, work a Saturday, or resequence trades to protect the completion date. In SiteCal, linking tasks means when one predecessor moves, every downstream task shifts automatically and the impact on the finish date shows immediately. For a deeper look, see task dependencies and the critical path in the guide.
Step 6: Assign resources, trades and suppliers
A schedule only works when real crews, subcontractors and suppliers are tied to specific tasks. For each one, link:
- A trade (concreter, carpenter, electrician, plumber, tiler)
- A key supplier (window manufacturer, joiner, steel fabricator)
- Critical equipment (crane hire, boom lift, scaffolding)
Example — Week 10 on a Brisbane renovation: the plumber and electrician begin rough-in concurrently (a start-to-start dependency), while external cladding continues with a separate crew. Check availability so the same concreter isn’t booked to two jobs on the same day; if there’s a clash, stagger start dates or add resources.
Review the draft for constructability and resource availability, and fold known risks into the schedule — for instance, flagging that 10-week window lead time and confirming the order date. In SiteCal, builders colour-code trades so the schedule shows at a glance who owns each activity, which helps avoid the costly delays that come from double-booked subbies and late procurement.
Step 7: Incorporate Australian calendars, public holidays and site hours
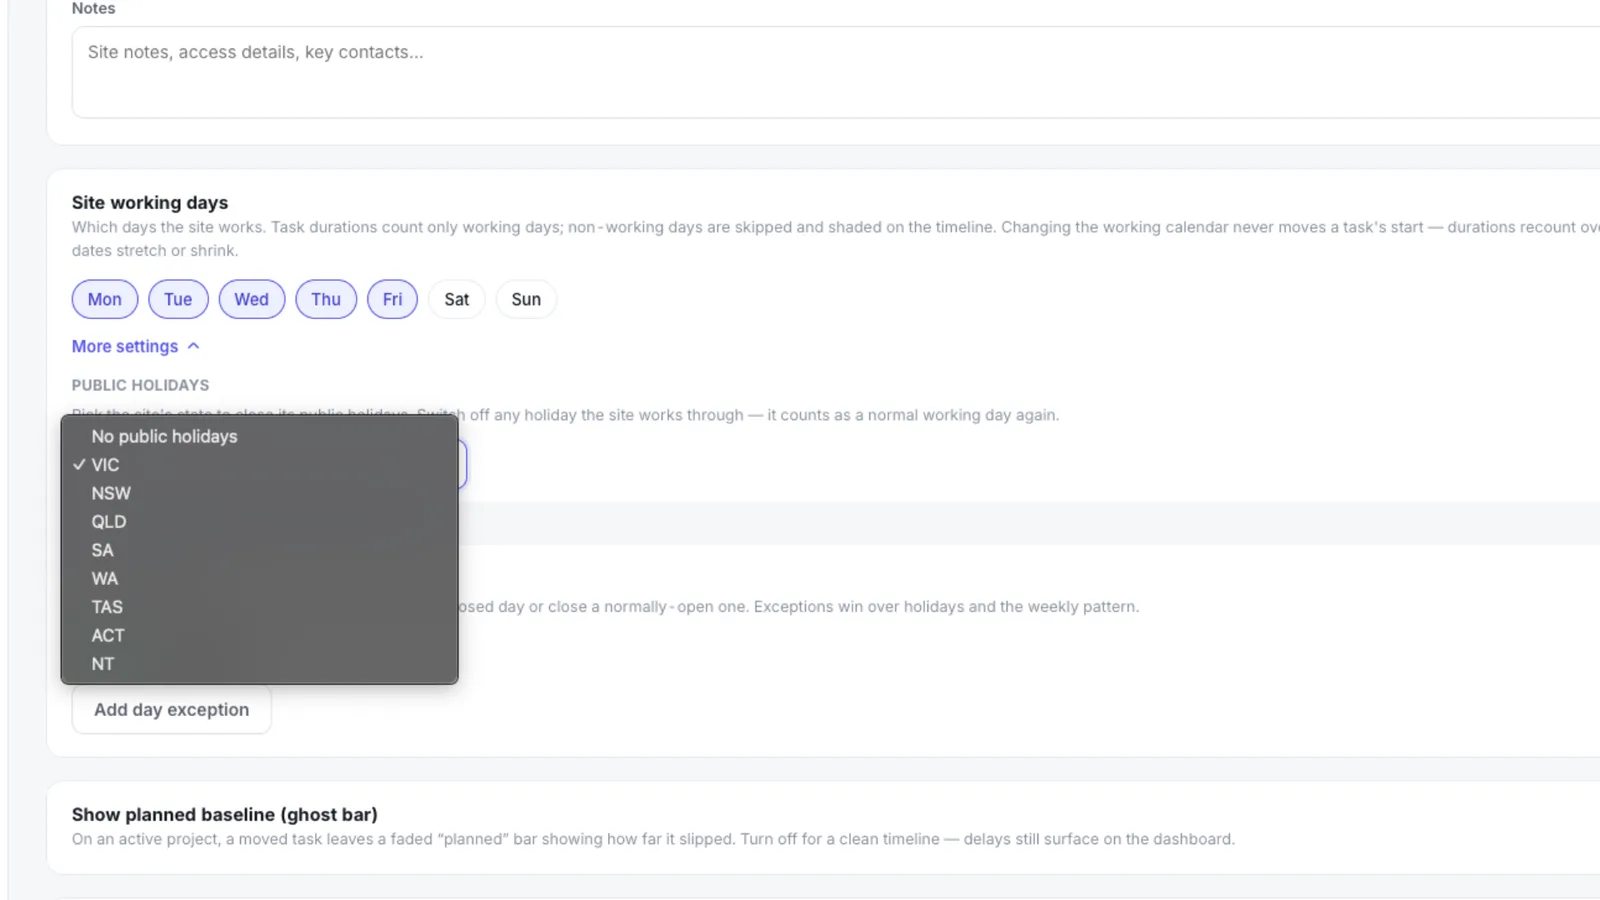
An accurate program reflects non-working days, RDOs and statutory holidays. Ignore them and your timeline will read optimistically — and expose you to contractual risk.
Key Australian public holidays that affect projects:
- Australia Day, ANZAC Day, Easter (Good Friday through Easter Monday)
- Labour Day (varies by state), King’s Birthday
- Christmas Day, Boxing Day, and the industry-wide Christmas/New Year shutdown (typically ~22 December to the second week of January)
Site hours follow council noise restrictions — in NSW, for example, Monday–Friday 7 am–6 pm and Saturday 8 am–1 pm, with no high-noise work on Sundays or public holidays; Queensland councils may allow 6:30 am–6:30 pm Monday–Saturday.
Configure your software so durations calculate in working days, not calendar days, and build known shutdowns — especially the Christmas break — into the baseline from day one. A timeline built on calendar days will understate the real programme length by weeks.
Step 8: Set a baseline schedule and tracking method
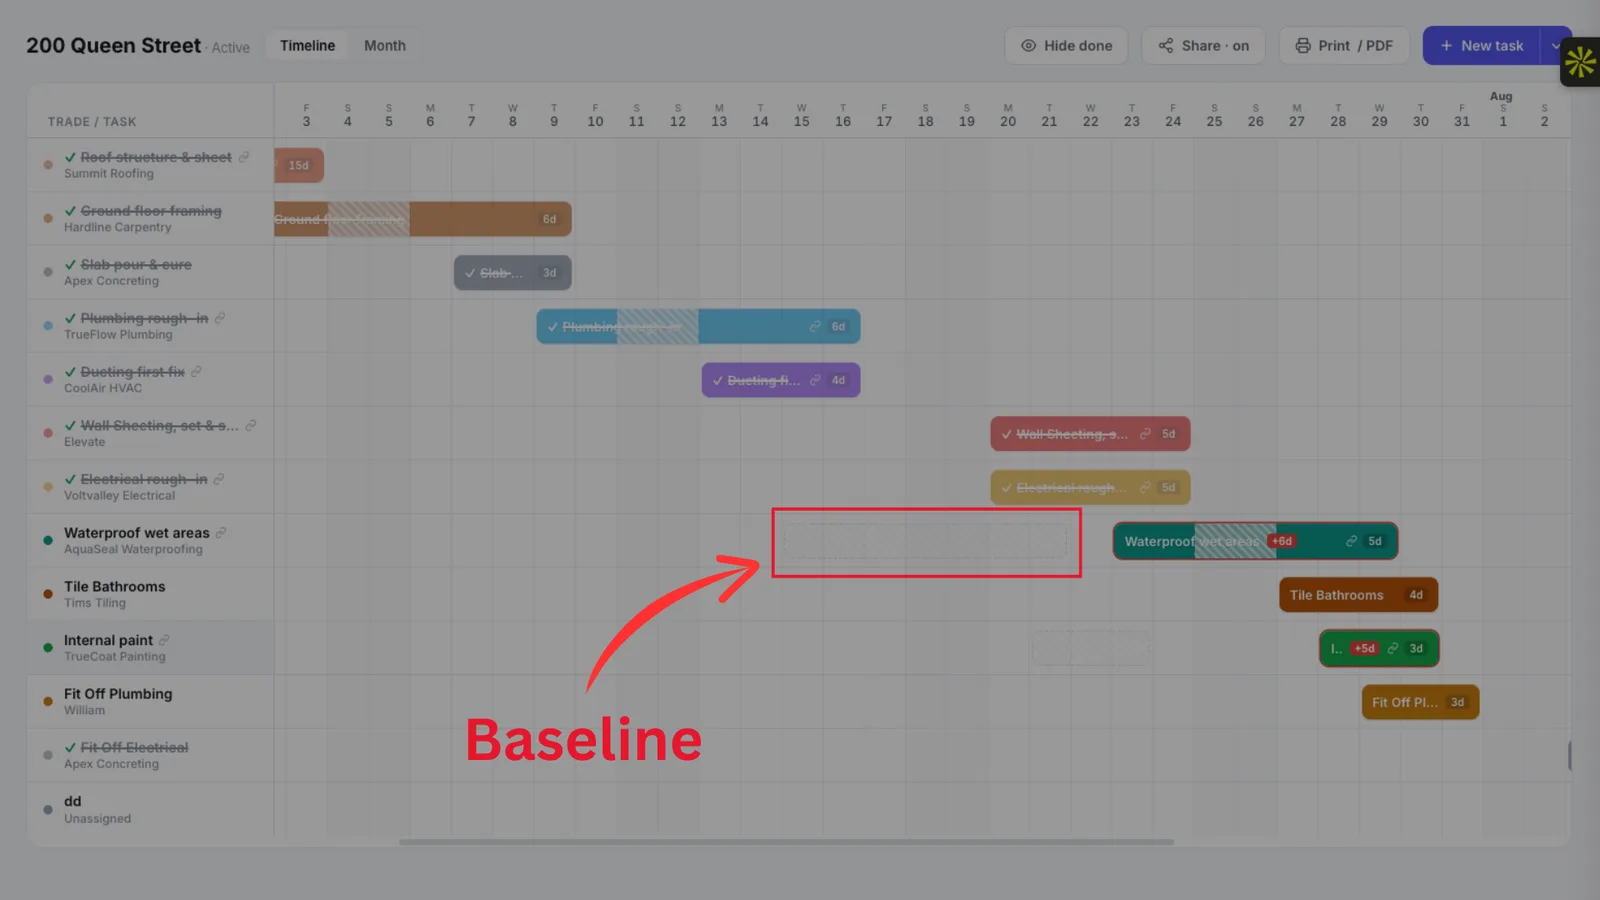
A baseline is the frozen reference version of the program at contract award (or the first agreed revision). It’s essential for measuring progress, managing extensions of time (EOTs), and demonstrating delay entitlement under standard forms like AS 4000.
Milestones mark the achievements everyone measures against — slab complete, lock-up, services rough-in done. Set a realistic date for each so progress is measurable and easy to communicate to the client and team.
Example: a 24-week commercial fit-out in Melbourne sets its baseline at the pre-start meeting. Week by week, actual start and finish dates are recorded against it, so by week 8 the project manager can see whether linings are tracking to plan or slipping. SiteCal shows how many days ahead or behind each project is versus its baseline, so slippage is easy to spot. Any major change to scope or access should trigger a formal baseline review and re-issue — not silent edits to the live schedule.
Step 9: Monitor progress, update the program and avoid delays
Scheduling is an ongoing process, not a one-off document produced at tender stage. A simple weekly cycle keeps the program aligned with reality:
- Walk the job and confirm what’s complete
- Update actual start and finish dates
- Adjust remaining durations based on site reality
- Compare progress to the baseline
- Record the reason for any delay (weather, variation, access, client change)
Software that tracks progress in real time helps you catch delays early and keeps the program honest, rather than letting hidden slippage build up.
Example: heavy rain in March in Brisbane delays earthworks by 5 working days. The updated schedule pushes the slab start back, which shifts framing and the downstream trades. To recover, you might resequence non-critical tasks, add a second crew, or schedule weekend work — and you document the weather event to support an EOT notice. In SiteCal, shifting a delayed activity updates the linked tasks automatically, so revised completion dates and the spots that need mitigation show straight away.
Step 10: Communicate the program with trades and clients
A program only works if everyone can see and understand it. Clear communication reduces disputes, surprises and last-minute calls about when trades are needed on site.
- Pre-start meetings: present the program to the client, architect and key subcontractors, focusing on critical milestones, site-access rules and the timeline.
- Filtered trade views: give each trade a view of only their tasks, dates and the trades either side of them. The plumber sees when framing completes; the tiler sees when waterproofing is done.
- Monthly calendar views: a colour-coded month helps subbies plan labour and deliveries — a simple one-month look-ahead beats a dense 30-page Gantt.
SiteCal lets you share read-only links so trades and clients can view up-to-date dates on any device without a paid login — no one buys a seat just to check when they’re next on site.
Step 11: Practical tips and common mistakes
After working through Steps 1–10, these are the do’s and don’ts that separate a program that holds up from one that falls apart on site.
Common mistakes to avoid:
- Over-optimistic durations that ignore weather or approval hold-ups
- Not updating the program after the first week
- A separate spreadsheet per project, with no single source of truth
- Ignoring procurement lead times for long-lead items
- Failing to clearly mark the critical path
- Forgetting public holidays, RDOs and restricted working hours
Best-practice tips:
- Keep one live program per project — your single source of truth
- Review weekly with your site team and track against the baseline
- Involve subcontractors early so durations reflect reality, not hope
- Lock in long-lead items at or before slab stage
- Use a dynamic calendar, not static PDFs, so the schedule evolves with the job
SiteCal addresses these head-on: a calendar-first interface to build a realistic schedule without enterprise bloat, automatic dependencies so the program updates itself when something moves, trade colour-coding so ownership is obvious, and progress tracking that shows days ahead or behind before slippage becomes a crisis.
Bringing it together
Creating a construction program with this process gives every job a clear roadmap from site establishment to handover. Whether you’re managing a single townhouse or juggling several jobs across different cities, the fundamentals are the same: define your constraints, build a realistic schedule, track progress honestly, and communicate relentlessly.
Want a worked example to start from? See our residential construction program example, or try SiteCal free for 14 days (no credit card required) to see how a purpose-built tool makes ongoing scheduling faster and more reliable.